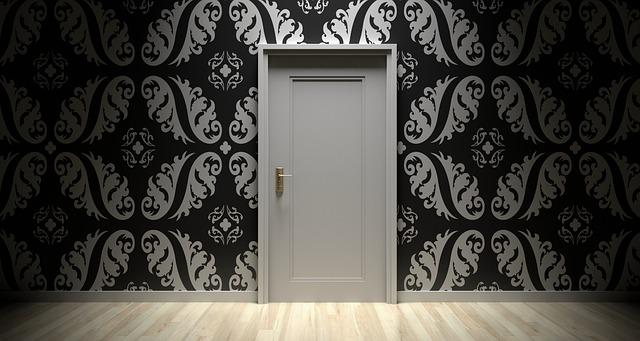
Wallpapers are back in trend. Using wallpaper in your home is a great way to give your house a striking look.
Some people prefer to paint or tile, but wallpapers are not off the hook. They come in several beautiful patterns, textures, and colors. You can go for a big and bold or soft and subtle wallpaper.
One other exciting thing about this design model is that you can install it yourself. It's quick and easy. You don't need to pay a professional.
Here is a step by step guide on how to apply the wallpaper of your choice and how to fix mistakes you may make.
First, let’s go through what you need.
Wallpaper Installation Tools
- Wallpaper
- Primer/paste
- Sandpaper
- Putty knife
- Wallpaper brush
- Measuring tape
- Wallpaper tray/table
- Level
- Clean cloth
How to Wallpaper a Room Step by Step
1. Prepare your wall

Your first step is to make sure your wall is ready for the wallpapers. Turn off the electricity to protect yourself. Remove all nails, screws, or hooks with pliers or screwdrivers. And cover the outlets with tape.
You will be using water to activate the wallpaper glue, therefore, it's advisable to do this to avoid electrocution. Taping your outlets helps you to achieve a clean paper installation.
If you have old wallpapers on the walk, remove them. Your putty knife will be convenient here – use it to scrape off old wallpapers entirely. Scrapping will take time, so leave out a day or two for your wallpaper. Make sure all traces of old wallpapers are removed, including the adhesive. If the wallpaper is old and sturdy, use a belt sander. After removing the old one, clean the wall thoroughly to get all dirt and mildew out. A mixture of two cups of bleach and a gallon of water will help in this case.
Smoothen the cracks on the wall with wall putty by applying it to any crack or holes you see on the wall. Covering cracks is necessary so that your wallpapering can come out smooth and clean. When you applied your wall putty, use a sandpaper to smoothen the patch into the surface.
2. Measure your wall

Measure your wall to be sure of how long the wallpaper should be. When measuring, add about 20cm for leeway at the top or bottom. It can cover up for incorrect measurements.
Then, spread out your wallpaper. Unroll it gently on a table and make marks or draw lines on where should be cut. Cut it out lightly; this is your first strip. Use a light pencil for this, or draw the line at the back of the wallpaper.
Then, draw a vertical line on the area that should be papered. Use a carpenter level and pencil. This line will be guided when you want to lay your first strip.
3. Paste your first strip

One common rule is to paste the wall and paste the paper. It can be tough and all messy. Applying paste on the paper will make it difficult to transport it from the table to the wall. It will stick to everything and even stick to itself, which can lead to tearing.
So, just apply a generous amount of glue or paste to the wall. Some wallpapers come with paste, so you don't have to use the adhesive on the wall. It is recommended that you follow the manufacturer's instructions when pasting.
Apply your first strip on the wall gently. Lay it from the ceiling and smooth it down the wall with a clean cloth or wallpaper brush. Leave out about 2 inches hanging at the top (close to the ceiling) and below (the floor). Press it on the wall firmly to create a faint line, which will be like a marking. The marking makes it easy to cut excess wallpaper away.
Start smoothing down from the middle of the paper to the edges. Since it's your first time, this first strip may not come out so perfect. So, be ready to peel it off gently and try again if need be. Just make sure your strokes are gentle to avoid creating a crease on the paper. Suppose you see some wrinkles forming up, pull the paper away from the wall gently. Then, when it gets to the wrinkled area, smoothen it out slowly.
4. Lay the second strip
This second strip is harder than the first; you have to match up patterns and avoid overlay. Not all wallpapers have a pattern sequence. Some are free and you can lay them however you want. But for wallpapers with patterns, be ready to match up and expect wastage.
Unroll your wallpaper and align it next to the first strip on the wall. If your wallpaper is patterned, you should start matching the patterns from the middle. Make sure you get it close enough.
Focus on matching the designs and make sure the paper doesn't overlap. The next strip must meet the first at the edge. Once again, leave a few inches at the top and below. You may use a seam roller to seal the seams. Let the roller sit for 5 minutes before wiping it off. Don't press on the wallpaper too hard so as not to press the glue out from underneath.
5. Wallpaper corners and tricky areas
Simply lay your paper round to the next wall for the corners. You should meet up the patterns at the edges as you did before. Then, press it in gently with your cloth or brush.
When the first wall is correctly lined to the corner, make a small incision at the top (where corner meets the ceiling) with scissors. The incision will make it easy to fold the paper.
Do the same for the bottom where the corner meets the skirting or floor before you move to the second wall. Press the paper with the cloth or wallpaper brush. Do this carefully and ensure that your wallpaper doesn't pull away from the other edge. If it does, pull it out gently and try again.
Tricky areas like outlets and switches aren’t much of a problem. Just lay the wallpaper over them, but don't press the strip down too much on these areas. Use your scissors to cut through at the center point. Then, press the paper down and smooth it around the edges of the socket.
When the paper has rested well, the shape of the outlet will be more definite. You can then cut the excess paper with a knife.
6. Cut out the excess paper

There are various ways to get the excess paper out. You can either use your free hand, ruler, or scissors.
Cutting out the excess paper with your cutting knife without using a ruler is good enough. Pushing a ruler into the crevice and cutting along with the knife is also perfect. But if this is too tricky for you, you can pull the wallpaper out slightly and rip the indented line with scissors.
Whichever option you choose, make sure you cut patiently.
Now, let's move to how to fix your mistakes.
Some mistakes to expect and how to fix them

- Trapped Bubbles
If you see bubbles, just relax, you haven't ruined it. Get a knife, glue injector, and seam adhesive. Make a small incision along the side of the air bubbles, use your glue injector to insert some adhesive and press it down. Then, clean excess glue with a clean cloth. If this is too tricky, you can gently peel your paper off the wall and smoothen it again.
- Peeling edges
Peeling edges will come up if you have a rough surface underneath your wallpaper. Lift the area and sand down the wall. Make it smooth enough, add wallpaper paste to the surface, and stick the wallpaper. If peeling persists, you may need to try another brand of wallpaper paste.
- Cutting away too much paper
This mistake is possible when you are trying to cut out excess wallpaper. Don't panic. Just stick back the part you cut out and re-cut. Make sure you meet the cut line but don't overlap. The cut will no longer be evident once the wallpaper is dried.
- Curled seam
You would have curled seam if you didn't add enough paste at the edges. If you notice this error, simply dampen the area with warm water. Then, lift the wallpaper and apply more paste under it. Smoothen the seam with little pressure and wipe off excess glue.
Conclusion
Wallpapering your home is not a difficult task. Follow the steps above to get a good result. Choose the best pattern and color that fit in with your furniture. Whether you apply the wallpaper to the whole room or just some part of it, you can be creative with it and design an exclusive home interior décor.


8 comments
Shayla
Hi my family member! I wish to say that this
post is amazing, great written and come with almolst all vital infos.
I’d like to peer extra posts like this . https://www.waste-Ndc.pro/community/profile/tressa79906983/
https://www.waste-ndc.pro/community/profile/tressa79906983/
Stunning story there. What happened after? Good luck! https://www.waste-ndc.pro/community/profile/tressa79906983/
Thelma
Wow! Finally I got a webpage from where I be capable of genuinely obtain helpful data
regarding my study and knowledge. https://Waste-Ndc.pro/community/profile/tressa79906983/
Thelma
Wow! Finally I got a webpage from where I be capable of genuinely obtain helpful data regarding mmy study andd knowledge. https://Waste-Ndc.pro/community/profile/tressa79906983/
https://www.Waste-ndc.pro/community/profile/tressa79906983/
It’s a pity you don’t have a donate button! I’d definitely donate to this outstanding blog!
I suppose for now i’ll settle for book-marking and adding your RSS
feed to mmy Google account. I look forward tto new updates and willl share thuis site with my Facebook group.
Chat soon! https://www.Waste-ndc.pro/community/profile/tressa79906983/
Leave a comment
This site is protected by hCaptcha and the hCaptcha Privacy Policy and Terms of Service apply.